
Overview
The Hazard Overview screen is the main workspace for viewing and managing an individual hazard in BowTie Pro. Think of it as the hazard’s home page: from here you can reach the BowTie structure, the associated threats and consequences, the diagram, the reporting tools, and every related action. Almost everything you do with a single hazard starts from this screen, so it’s worth knowing your way around it.
Opening the Hazard Overview Screen
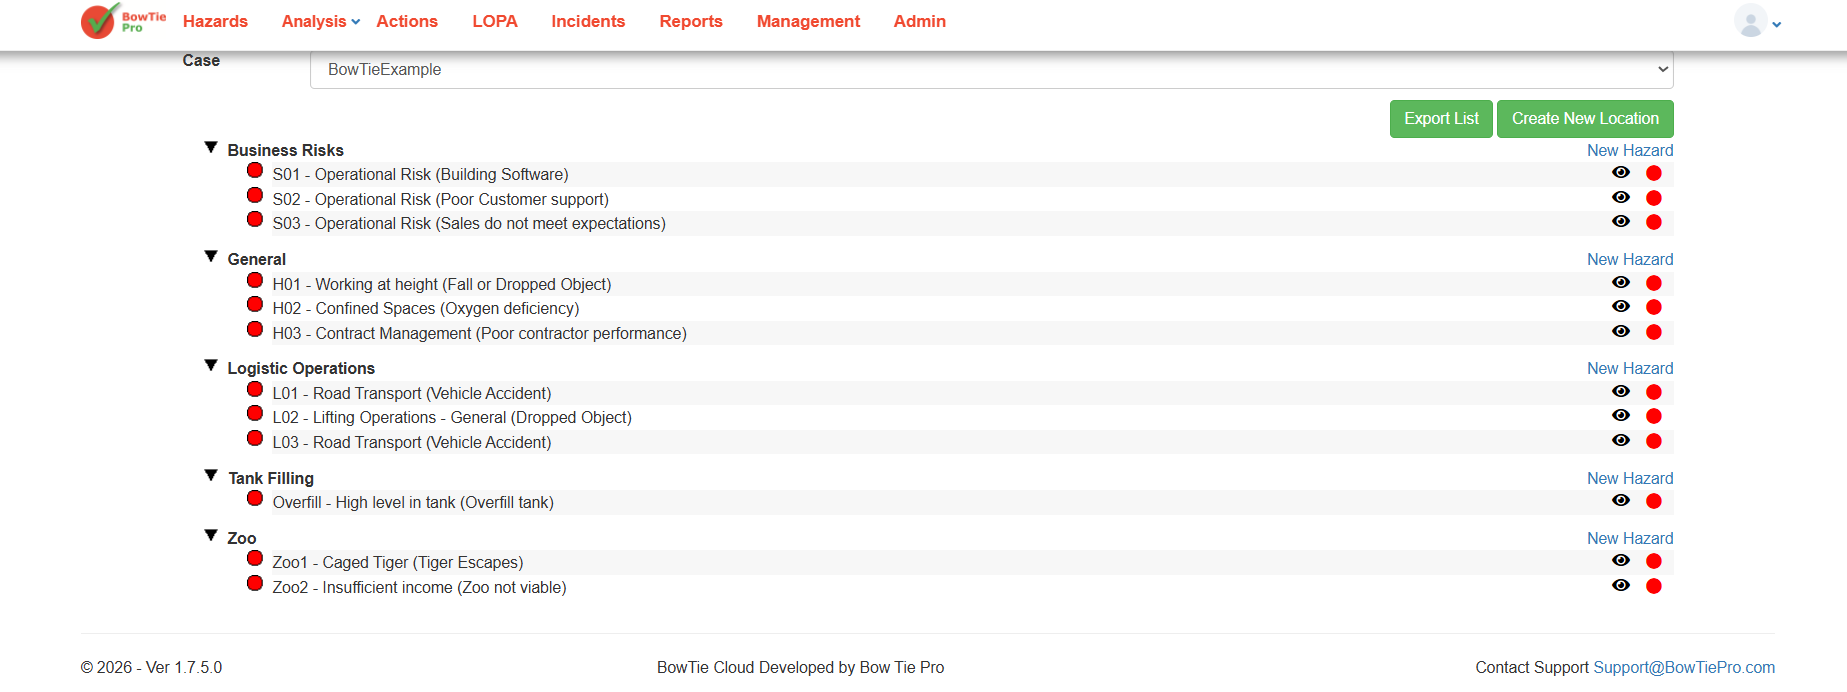
1. Go to Hazards
- From the top menu, click Hazards
2. Open a Hazard
- Locate the required hazard in the list
- Click the 👁 (View) icon next to the hazard
- This opens the Hazard Overview screen.
Hazard Information Section
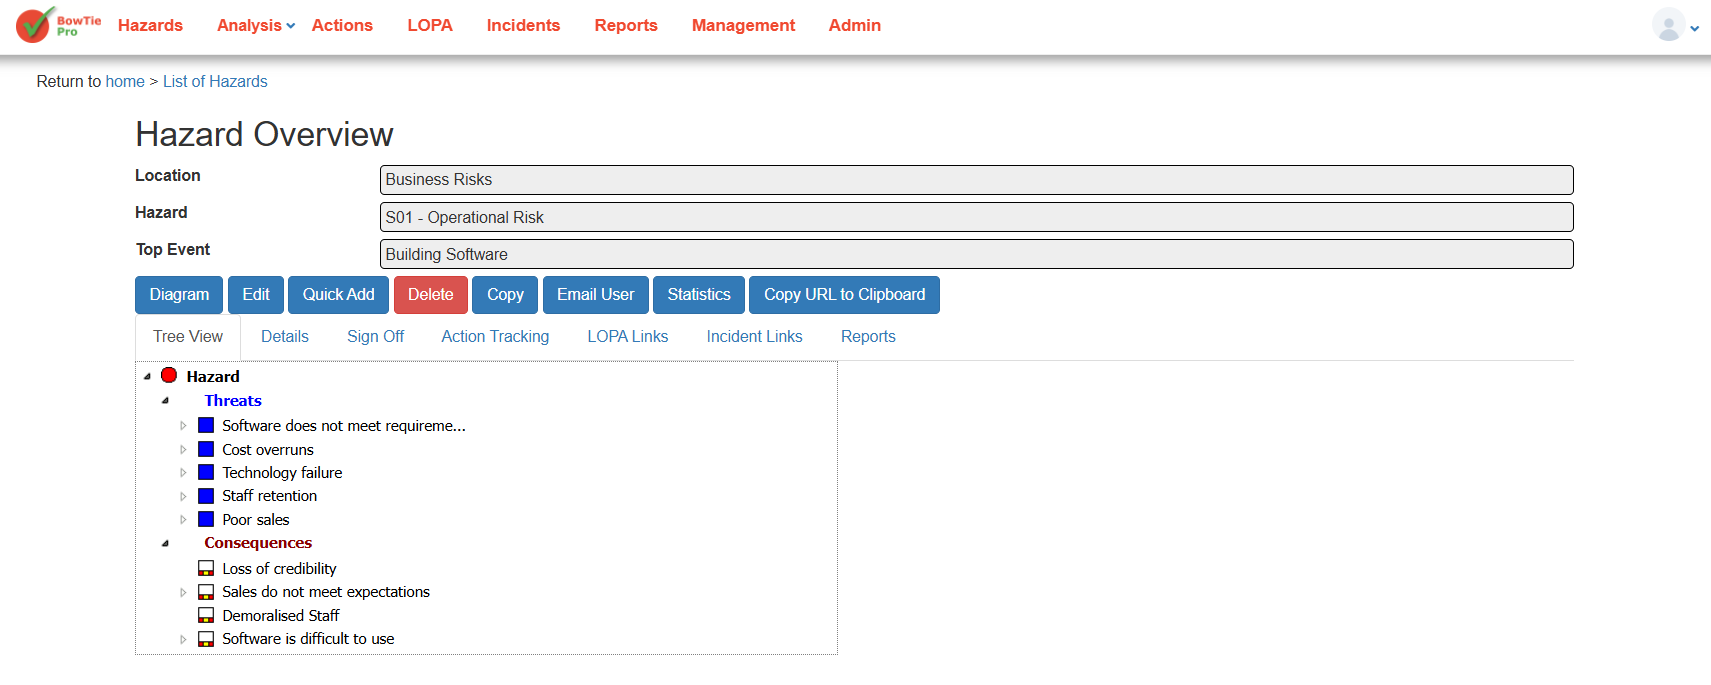
At the top of the screen, the following information is displayed:
- Location
- Hazard
- Top Event
Together these three fields tell you, at a glance, exactly which BowTie item you’re looking at.
Action Buttons
A row of action buttons gives you quick access to the main things you can do with the hazard:
- Diagram – opens the BowTie diagram view for the hazard.
- Edit – opens the hazard details so you can modify them.
- Quick Add – quickly add threats, consequences, and their controls.
- Delete – removes the hazard from the system.
- Copy – creates a duplicate of the hazard, useful as a starting point for a similar one.
- Email User – shares the hazard information by email.
- Statistics – displays statistical information about the hazard.
- Copy URL to Clipboard – copies a direct link to this Hazard Overview screen.
Navigation Tabs
Below the action buttons, a set of tabs organises the deeper detail behind the hazard:
- Tree View – displays the BowTie structure, including threats, consequences, and the related hierarchy.
- Details – shows additional information about the hazard.
- Sign Off – supports review and approval workflows.
- Action Tracking – displays linked actions and follow-up activities.
- LOPA Links – shows associated LOPA assessments and links.
- Incident Links – displays related incidents connected to the hazard.
- Reports – provides reporting options for the hazard.
Together, these tabs connect a single hazard to the wider BowTie Pro ecosystem — action tracking, LOPA, incidents, and reporting all hang off this one screen.
Tree View Structure
The Tree View is where the BowTie itself takes shape, showing threats and consequences branching from the hazard.
Threats are the causes that may lead to the top event. For example:
- Cost overruns
- Technology failure
- Staff retention
Consequences are the outcomes that may follow if the top event happens. For example:
- Loss of credibility
- Sales not meeting expectations
- Demoralised staff
Expanding any threat or consequence in the tree reveals the controls linked beneath it, so you can see the full cause-barrier-outcome structure in one place.
Summary
The Hazard Overview screen is the central management area for BowTie analysis in BowTie Pro. From a single view it gives you the hazard’s full structure, its controls and actions, its diagram, and its reporting tools — everything needed to manage that risk effectively. Once you’re comfortable navigating this screen, the rest of BowTie Pro falls into place around it.