
Overview
Controls are critical elements in BowTie Pro that help prevent threats from causing a top event or reduce the impact of consequences. Controls are linked directly to threats and consequences and can be added during the risk modelling process.
How Controls Are Structured
In BowTie Pro:
- Controls are associated with:
- Threats (preventive controls)
- Consequences (recovery/mitigation controls)
- Controls are not created independently — they are added as part of:
- Threat creation
- Consequence creation
Controls can be added from several locations
Adding Controls from the Diagram
Open a Diagram
- Naviagating to Hazards
- Select the red circle to the right of the bowtie that needs updated
- Expand the Threat or Consequence
- Left click on the Threat or Consequence. This will open up the menu
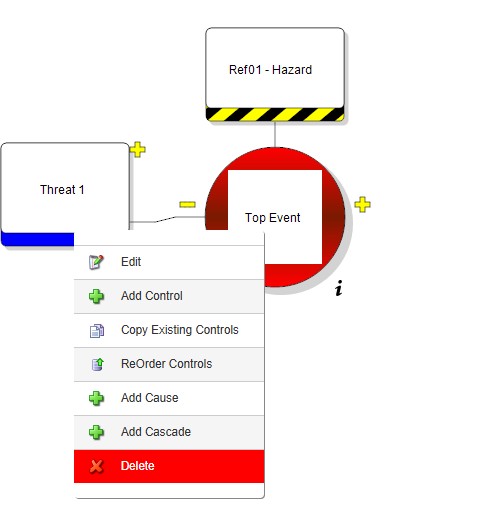
- From the menu select the “Add Control” option to go to the Edit screen.
- The Control Details screen is customisable in both the data fields that capture the data and the options within the drop downs
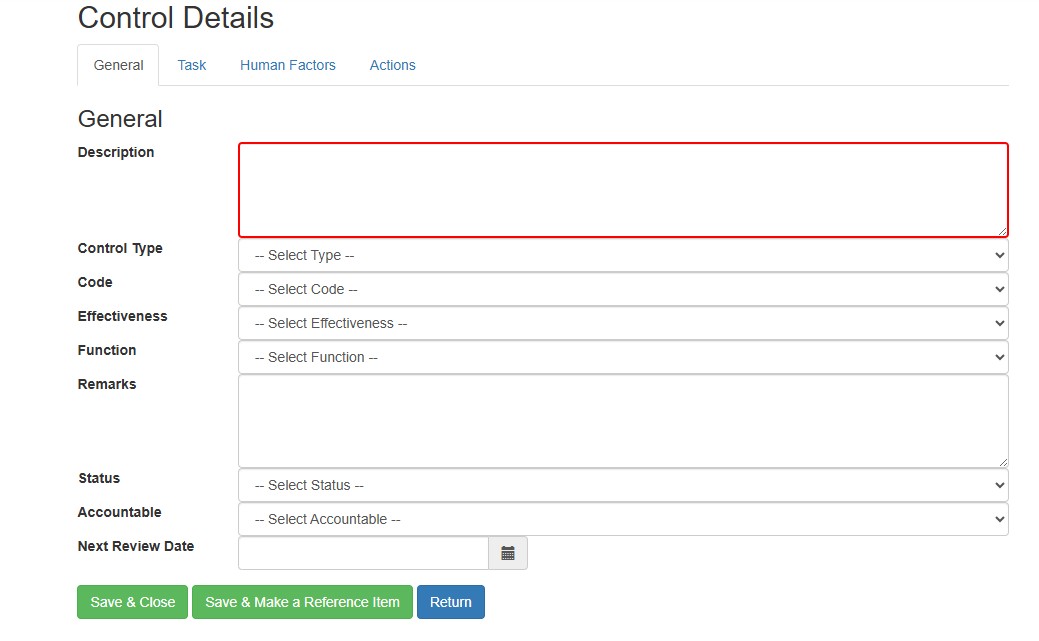
The Description is mandatory but all other information is optional
The drop down options (if used) allow various data to be captured
- Control Type -This determines the colour of the barrier and can be used for KPIs, Regulatory Status etc
- Code – This is text code eg HW for hardware
- Effectivness – This is colour coded examples include Very Good, Good, poor
- Function – examples include Recovery, prevention etc
- Remarks – This allows additional description
- Status – Status of the control
- Accountable – Who is the owner of the control
- Review Date – Allows the next review to be entered if appropriate
As well as this tasks can be entered on how the control is managed, verified and who is responsible for the management of the task, The Human Factor can be entered and the Actions can be entered in the system. More details on creating and managing Actions are available later on.
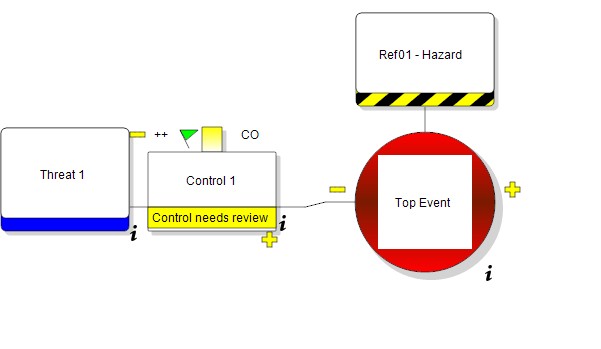
Once the barrier is completed, press Save and Close and the diagram will be returned with the new control in place
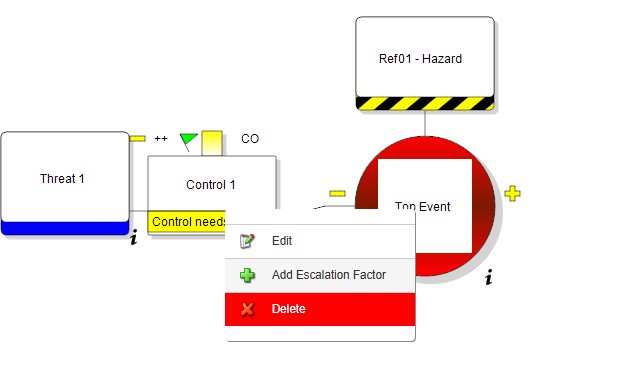
To Edit the Control on the Diagram, left click the item and then select the “Edit” option to open the screen as shown above.
Adding Controls from the Hazard Overview screen
- Go to Hazards
- Navigate to the Hazards screen on the menu
- Click the 👁 (View) icon next to a hazard that you wish to manage
- This opens the Hazard Overview screen
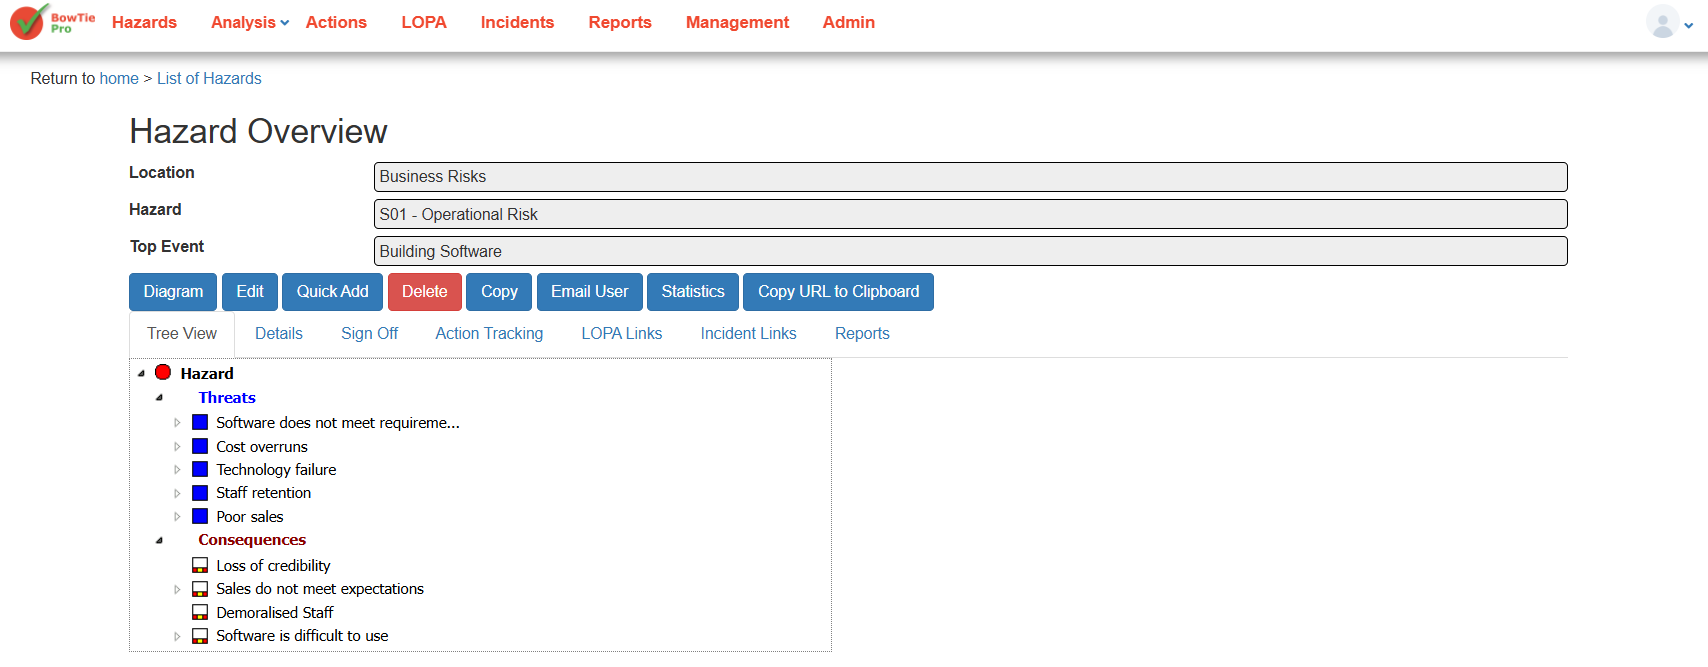
Using the tree click on either the Threat or Consequence that the additional control should be added
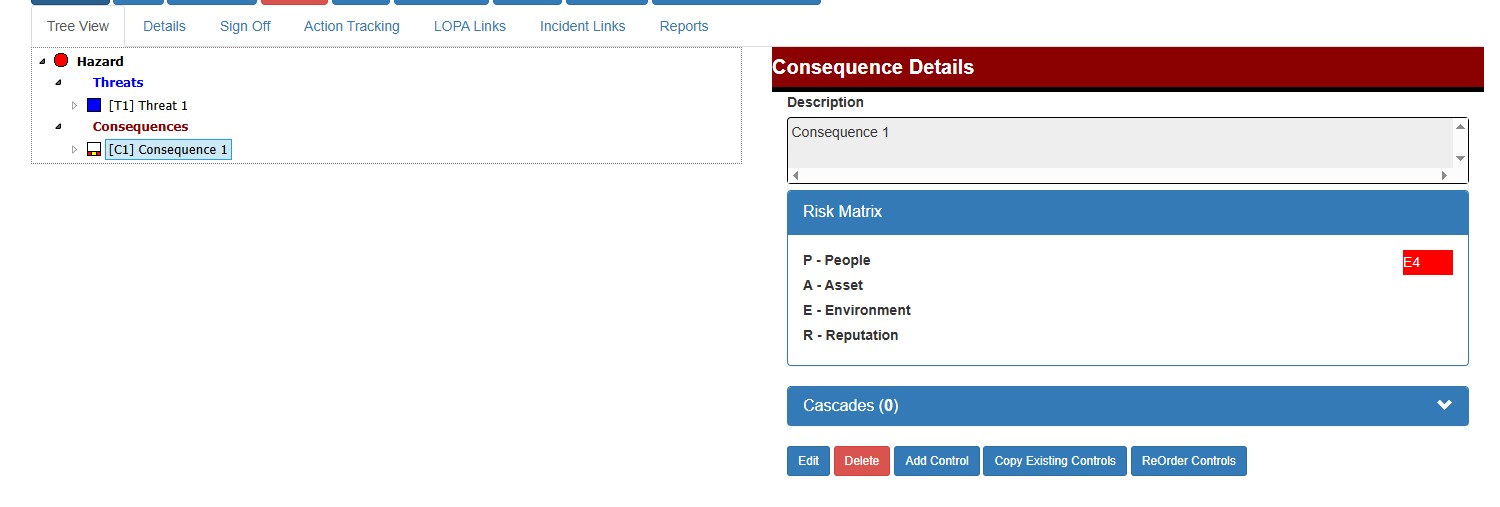
- The Right hand side of the tree will show the details of the Threat or Consequence.
- Now Click “Add Control” at the bottom on the right hand side.
- The Edit screen will open as shown above.
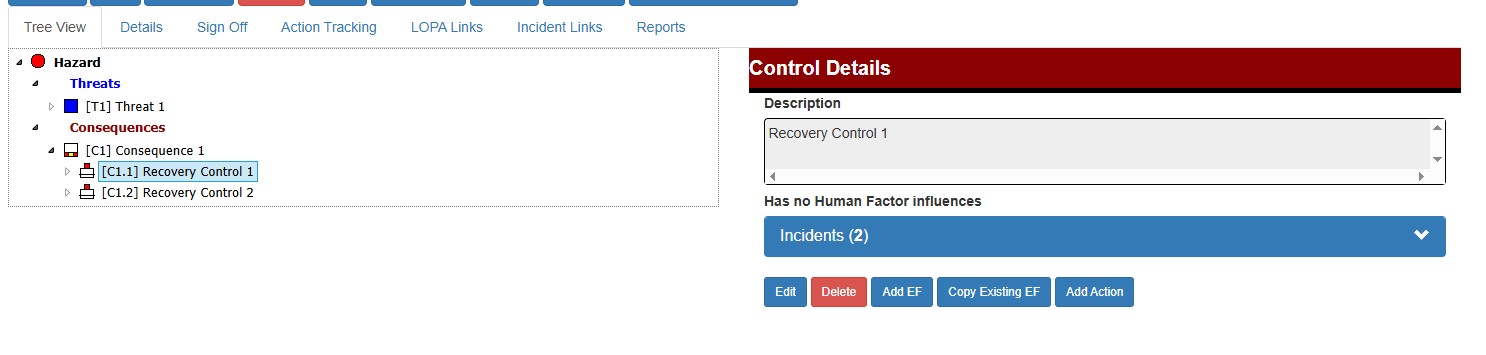
- Once the control is entered this will be added to the tree once the parent is expanded and clicking on the new item will show the details.
- To modify any details click the “Edit” button below the details
Summary
Controls are essential for managing risk in BowTie Pro. By linking controls to threats and consequences, you can build a strong and effective risk model that helps prevent incidents and reduce impact