Overview
Creating a hazard is the first step in building a BowTie analysis in BowTiePro. A hazard represents a risk scenario and forms the foundation for defining threats, consequences, and controls.
Steps to Create a New Hazard
1. Go to the Hazards Section
- From the top menu, click Hazards
- This will open the Hazard List screen
2. Click “New Hazard”
- On the right side of a location group, click New Hazard
- The Hazard Details screen will open

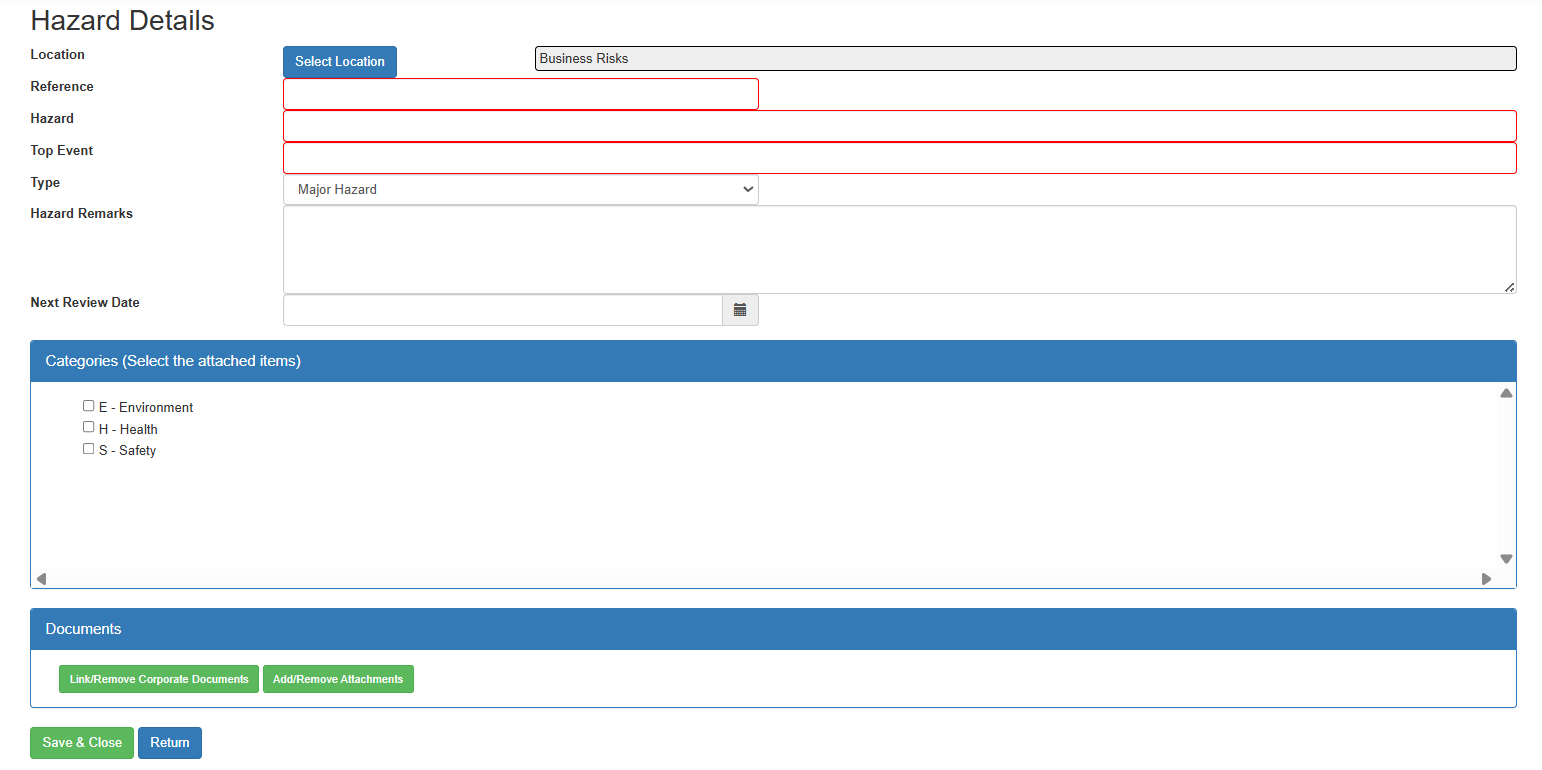
Hazard Details Fields Explained
On the Hazard Details screen, you need to fill in the following fields:
3. Select Location
- Click Select Location
- Choose the appropriate location/category (e.g., Business Risks, General, etc.)
👉 This determines where the hazard will be grouped
4. Enter Reference
- Add a unique Reference for the hazard
- Example: H01, L02, etc.
👉 This helps identify the hazard in lists and reports
5. Enter Hazard
- Provide a clear description of the hazard
- Example: Working at height
👉 This defines the risk source
6. Define Top Event
- Enter the Top Event (loss of control scenario)
- Example: Fall or dropped object
👉 This represents the point where control over the hazard is los
7. Select Type
- Choose the hazard type from the dropdown
- Default example: Major Hazard
👉 This helps classify the severity or category
8. Add Hazard Remarks (Optional)
- Enter any additional notes or context about the hazard
9. Set Next Review Date
- Select a Next Review Date using the calendar icon
👉 This helps schedule periodic reviews
10. Select Categories
- Choose applicable categories such as:
- Environment
- Health
- Safety
👉 These help classify the hazard for reporting and filtering
Final Step: Save the Hazard
Once all required fields are filled:
- Click Save (or equivalent button)
- The hazard will be created and added to the selected location
Creating a hazard in BowTiePro is a straightforward process that sets the foundation for your entire risk analysis. Once created, you can proceed to define threats, consequences, and controls to complete the BowTie model.