This quick start guide introduces the basic workflow for getting started with BowTiePro Cloud Edition.
By following these steps, new users can quickly learn how to:
- Navigate the platform
- Understand cases and hazards
- Create BowTie diagrams
- Perform risk assessments
- Track incidents and actions
- Monitor operational risks
Step 1 — Log In to BowTiePro
Open the BowTiePro Cloud Edition login page and sign in using your assigned credentials.
After logging in, users are typically redirected to the:
- Dashboard
- Management Overview
- Last accessed module
depending on permissions and system configuration.
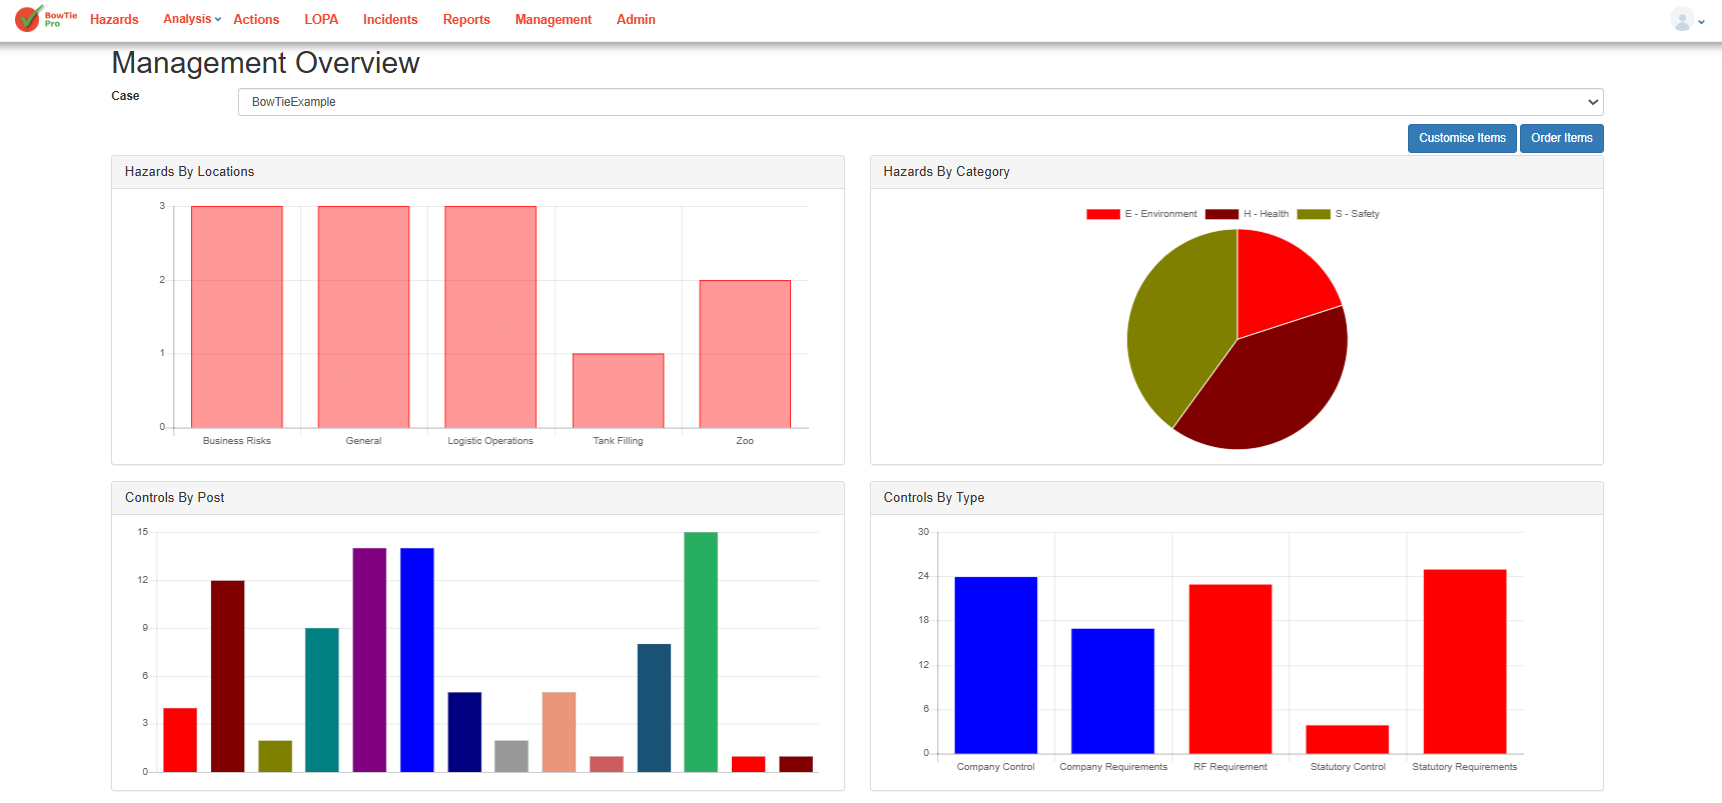
Step 2 — Review the Dashboard
The dashboard provides a centralized overview of:
- Hazards
- Incidents
- Controls
- Actions
- Operational metrics
- Risk analytics
Reviewing the dashboard helps users understand current operational risk status and outstanding activities.
Step 3 — Understand Cases and Locations
BowTiePro organizes operational data using:
- Cases
- Locations
- Hazards
Cases help separate operational environments, while locations organize hazards within each case.
Before creating risk assessments, users should understand how their organization structures operational data.
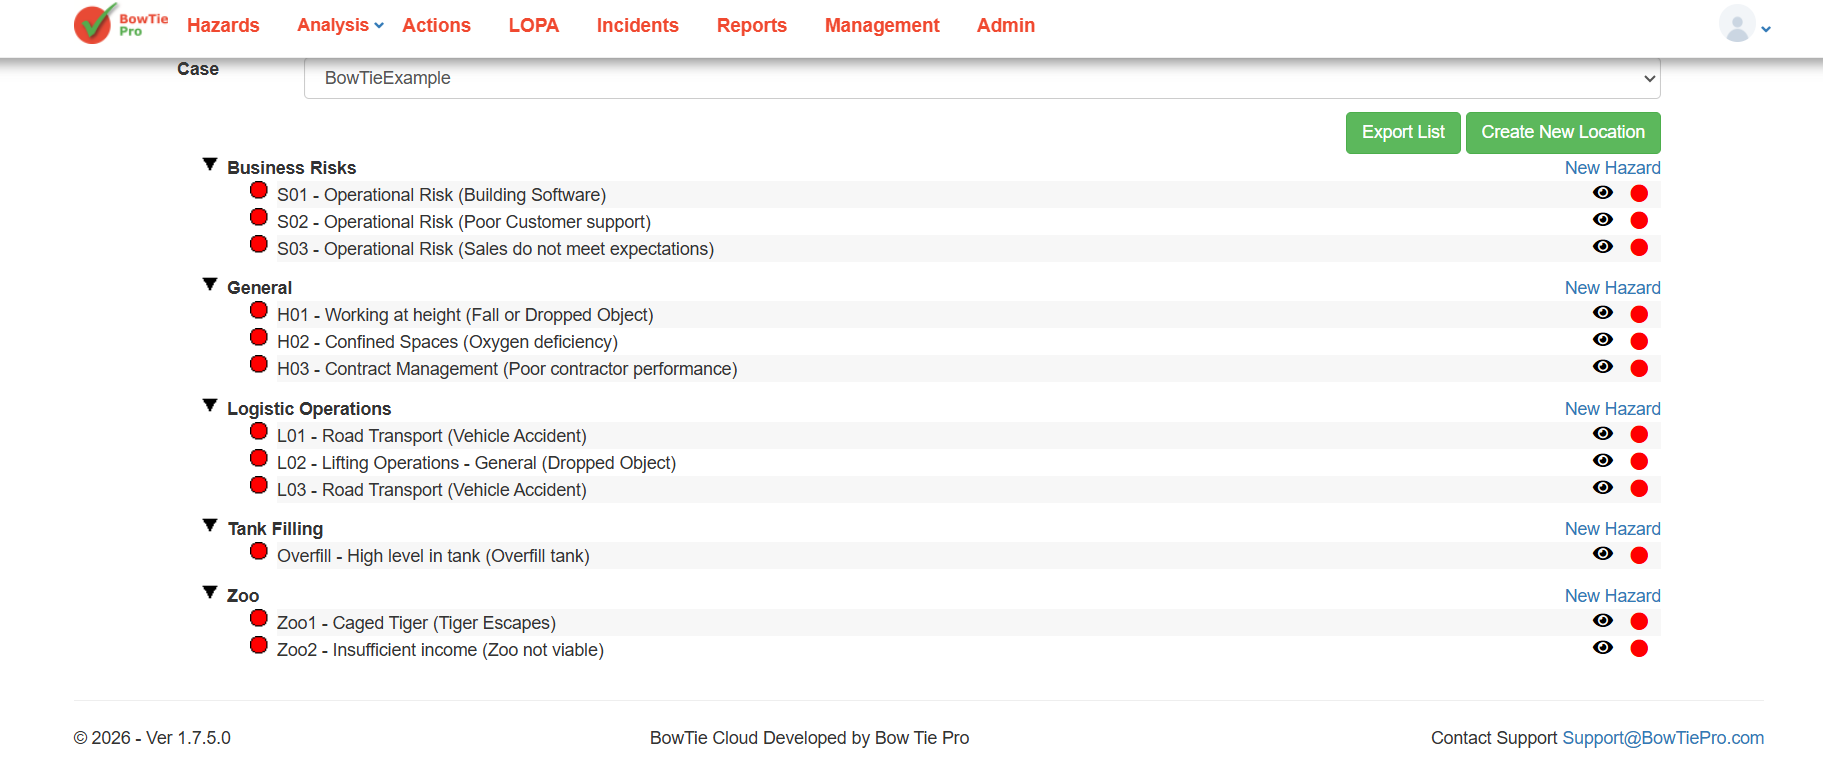
Step 4 — Create or Review Hazards
Hazards form the foundation of BowTie analysis.
Users can:
- Create hazards
- Review existing hazards
- Link threats and consequences
- Configure controls and safeguards
Hazards are later used for:
- BowTie diagrams
- LOPA assessments
- Incident management
- Corrective actions
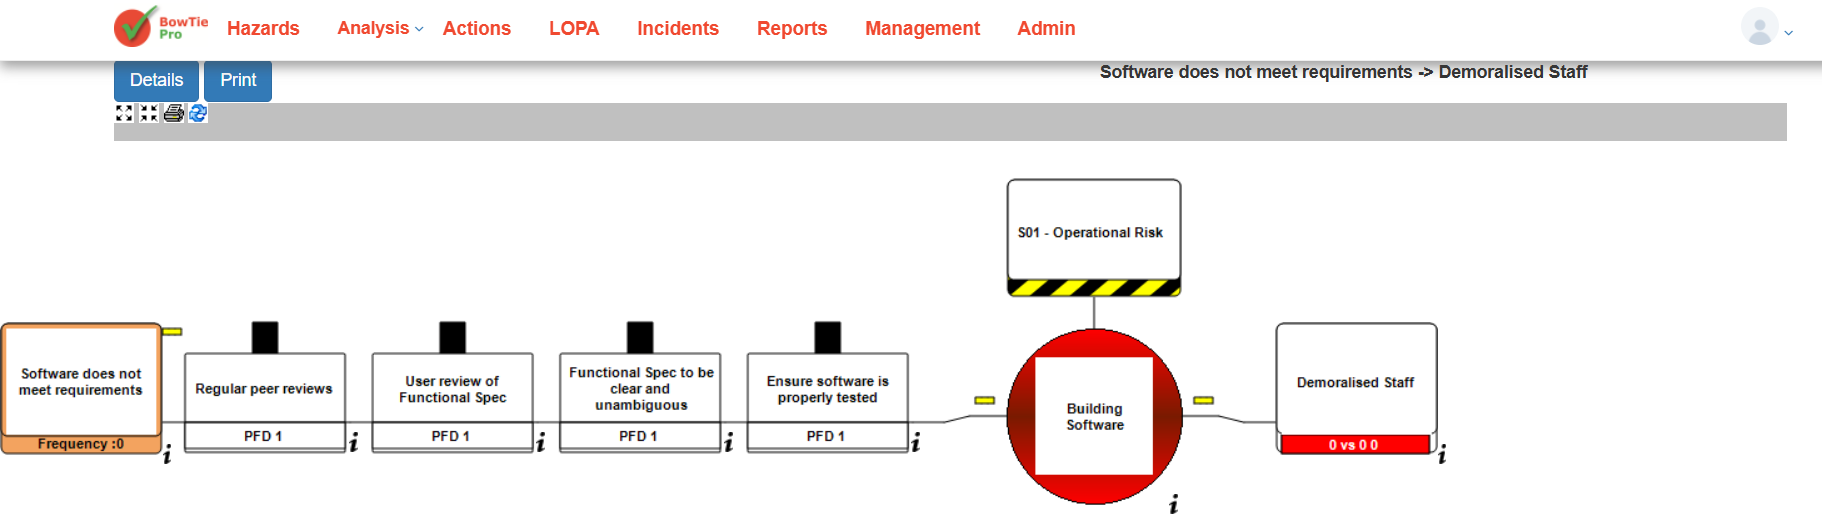
Step 5 — Build BowTie Diagrams
BowTie diagrams visually represent:
- Threats
- Consequences
- Preventive controls
- Recovery controls
- Escalation factors
These diagrams help teams understand how operational risks are controlled.
Users can:
- Add threats and consequences
- Configure barriers
- Customize diagrams
- Export visual reports
Step 6 — Perform LOPA Assessments
The LOPA module helps organizations evaluate:
- Threat frequency
- Control effectiveness
- PFD values
- Acceptance criteria
- Residual risk
LOPA assessments support deeper operational risk analysis and help evaluate safeguard effectiveness.
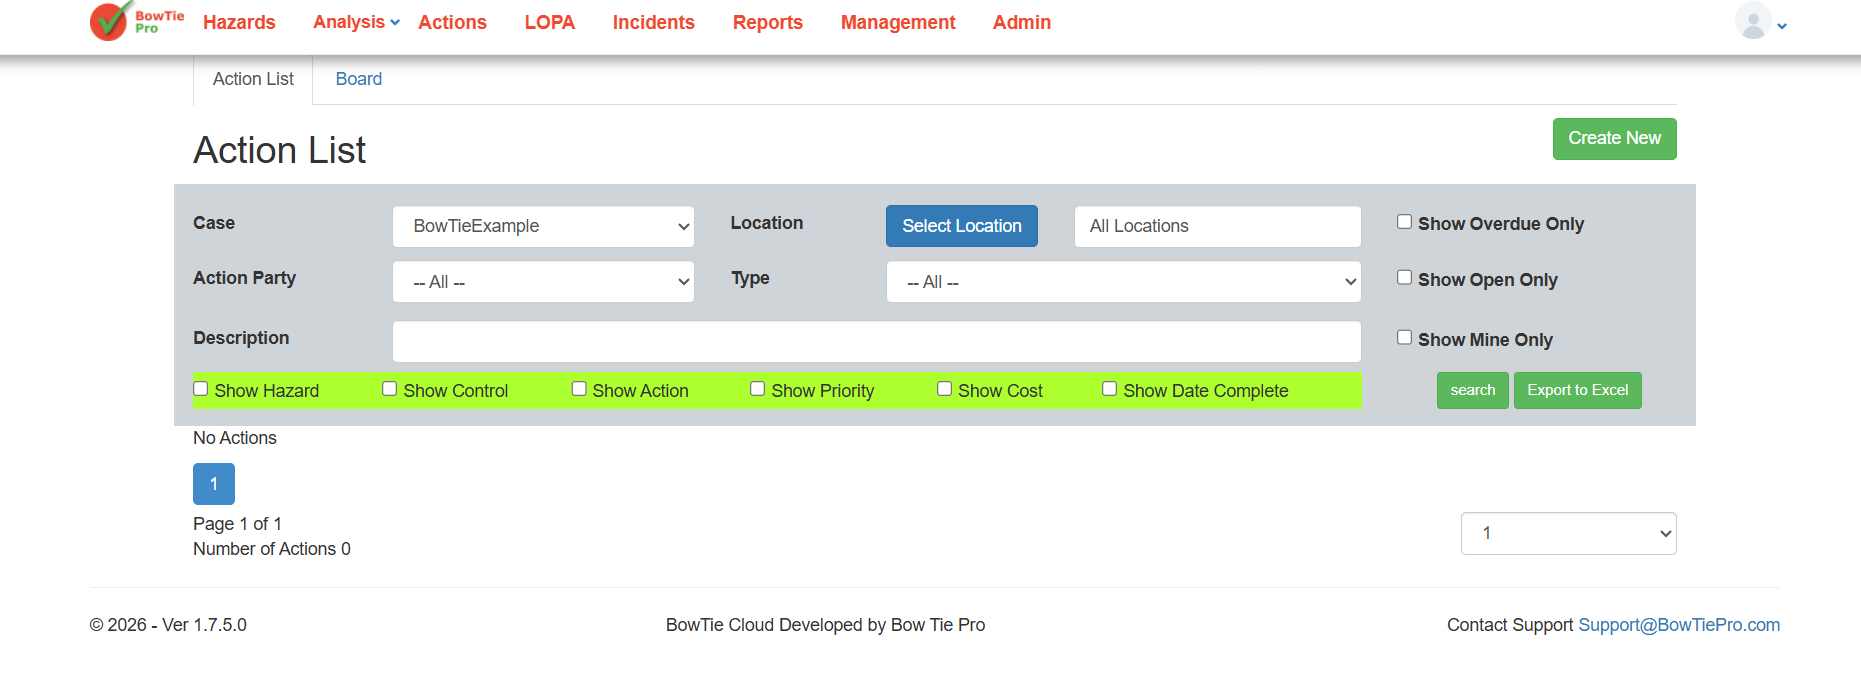
Step 7 — Track Actions and Deficiencies
BowTiePro allows users to create and monitor corrective actions.
Users can:
- Assign actions
- Set priorities
- Define due dates
- Monitor workflow progress
- Track deficiencies
This helps organizations improve accountability and operational follow-up.
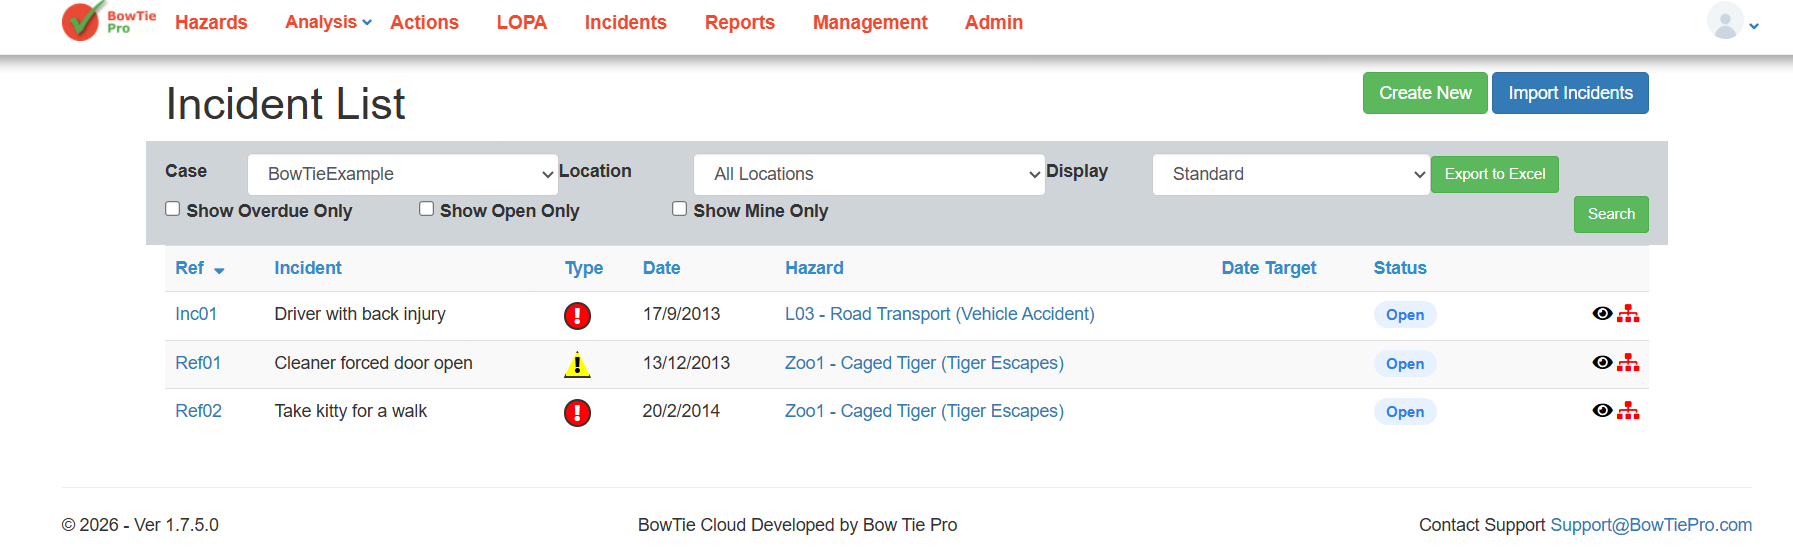
Step 8 — Monitor Incidents
The incident management module helps organizations:
- Record incidents
- Track investigations
- Link incidents to hazards
- Monitor corrective activities
This supports operational learning and continuous improvement.
Step 9 — Use Dashboards and Reports
Dashboards and analytics provide visibility into:
- Risk distribution
- Hazard trends
- Incident activity
- Action tracking
- Operational performance
Management teams can use this information to improve oversight and decision-making.
Best Practices for New Users
When getting started with BowTiePro:
- Start with a small number of hazards
- Use consistent naming conventions
- Keep action statuses updated
- Review dashboards regularly
- Link incidents to the correct hazards
- Maintain accurate risk information
Taking a structured approach helps users become familiar with the platform more efficiently.
BowTiePro Cloud Edition combines BowTie analysis, LOPA assessments, incident management, action tracking, and dashboards into a centralized operational risk management platform.
By understanding the basic workflow and navigation structure, new users can quickly begin managing hazards, tracking risks, and improving operational safety processes.