Overview
Controls are critical elements in BowTiePro that help prevent threats from causing a top event or reduce the impact of consequences. Controls are linked directly to threats and consequences and can be added during the risk modeling process.
How Controls Are Structured
In BowTiePro:
- Controls are associated with:
- Threats (preventive controls)
- Consequences (recovery/mitigation controls)
- Controls are not created independently — they are added as part of:
- Threat creation
- Consequence creation
Adding Controls
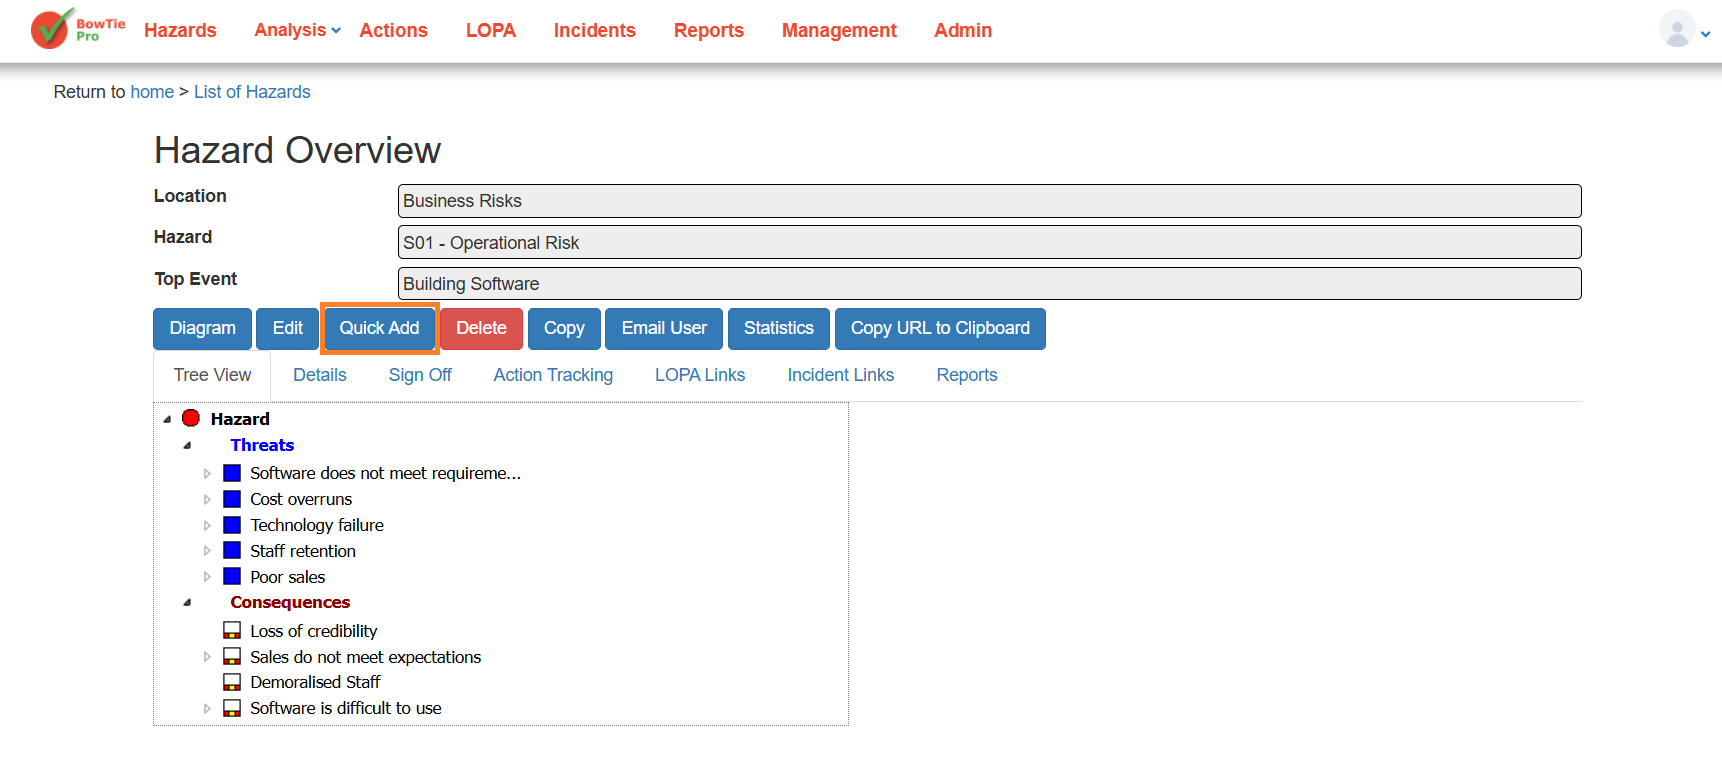
1. Open a Hazard
- Go to Hazards
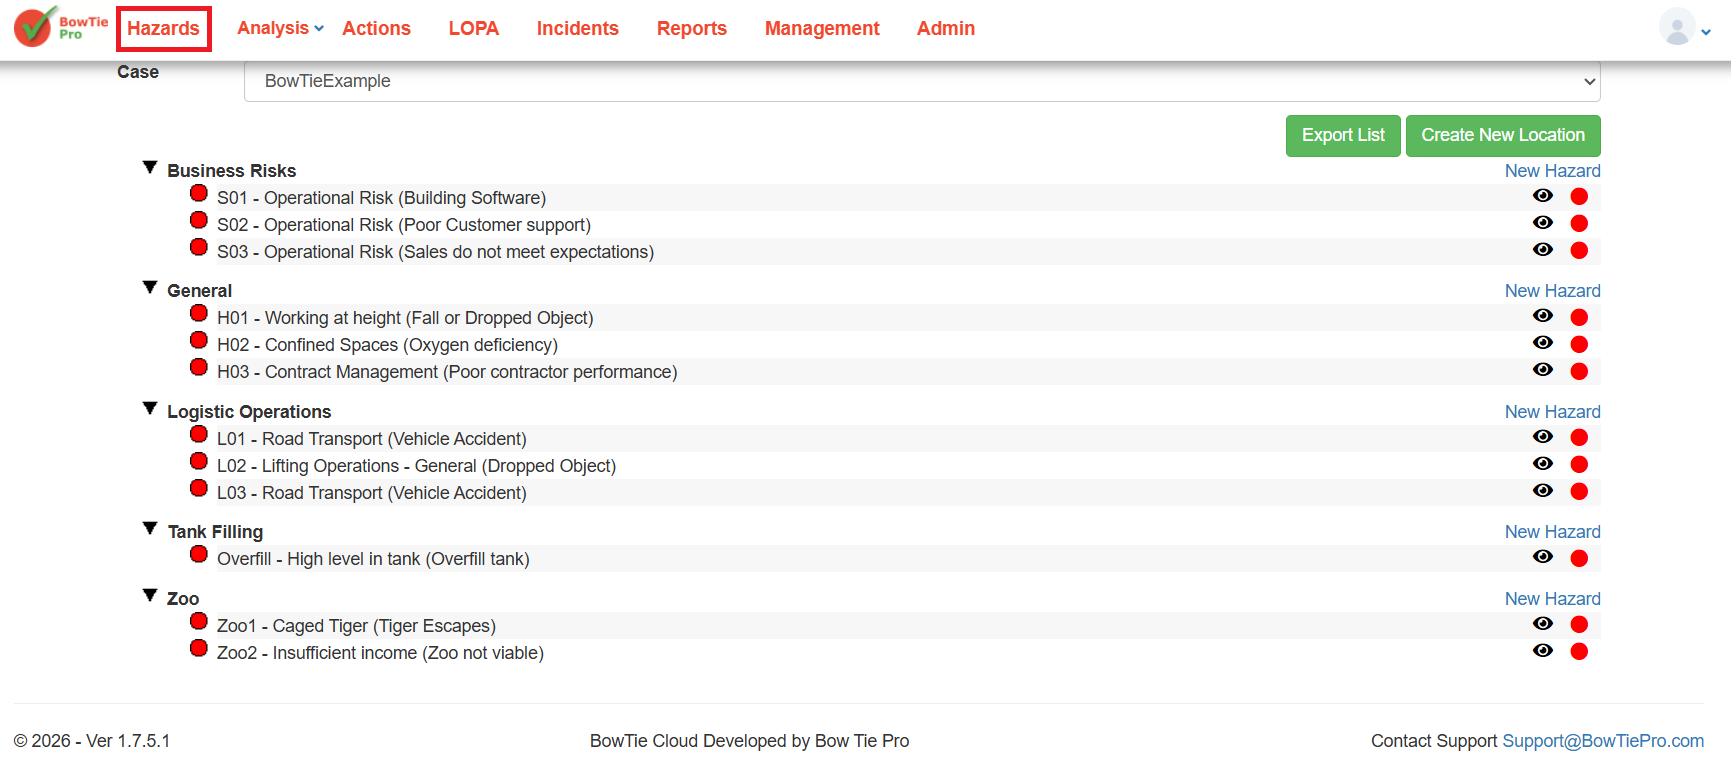
- Click the 👁 (View) icon next to a hazard
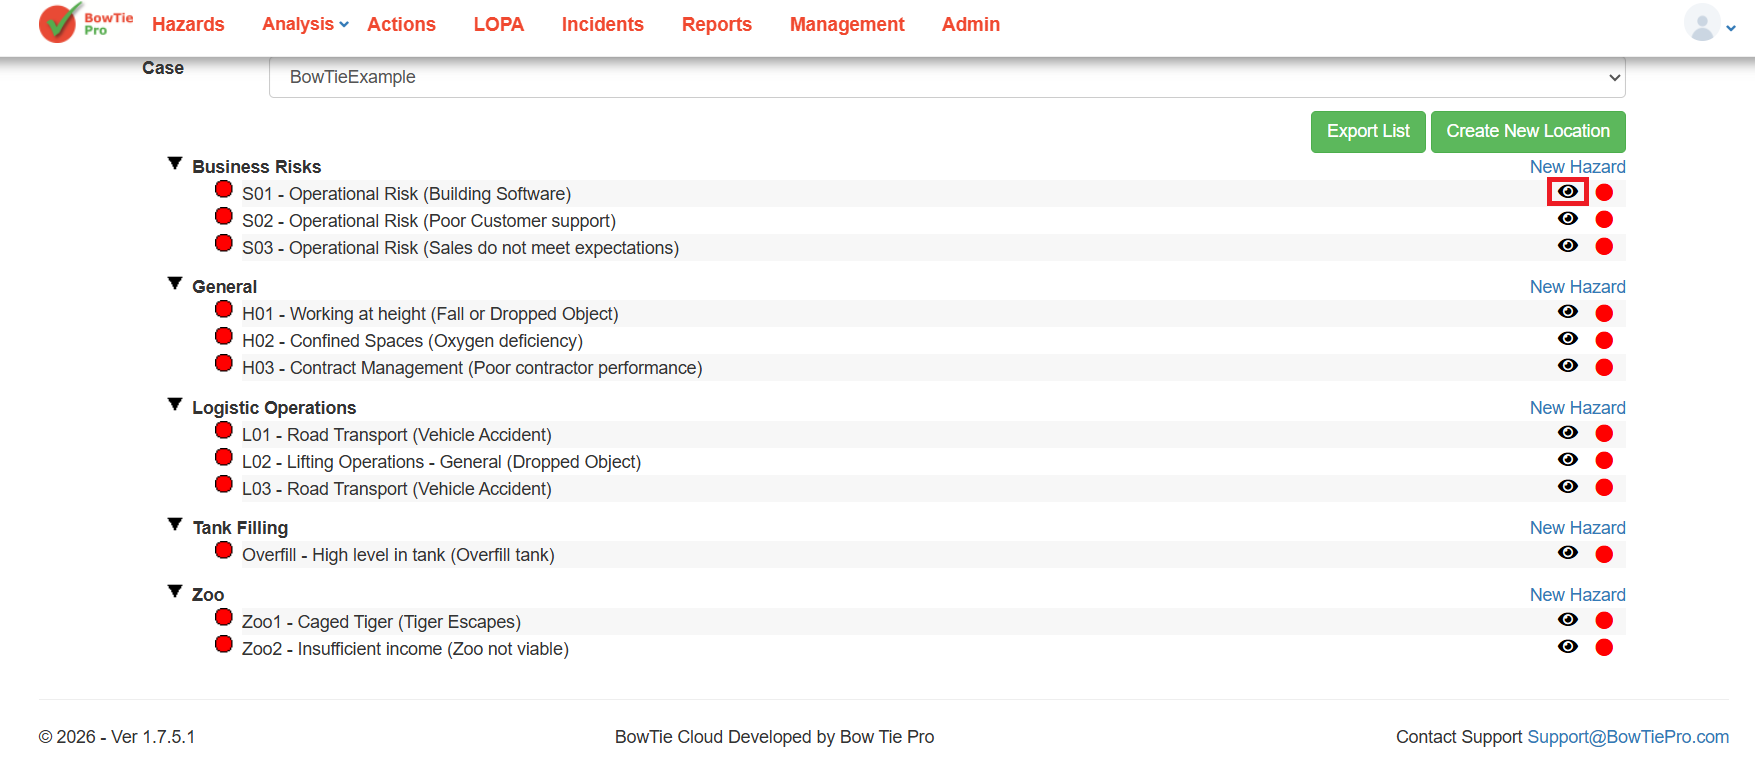
- This opens the Hazard Overview screen
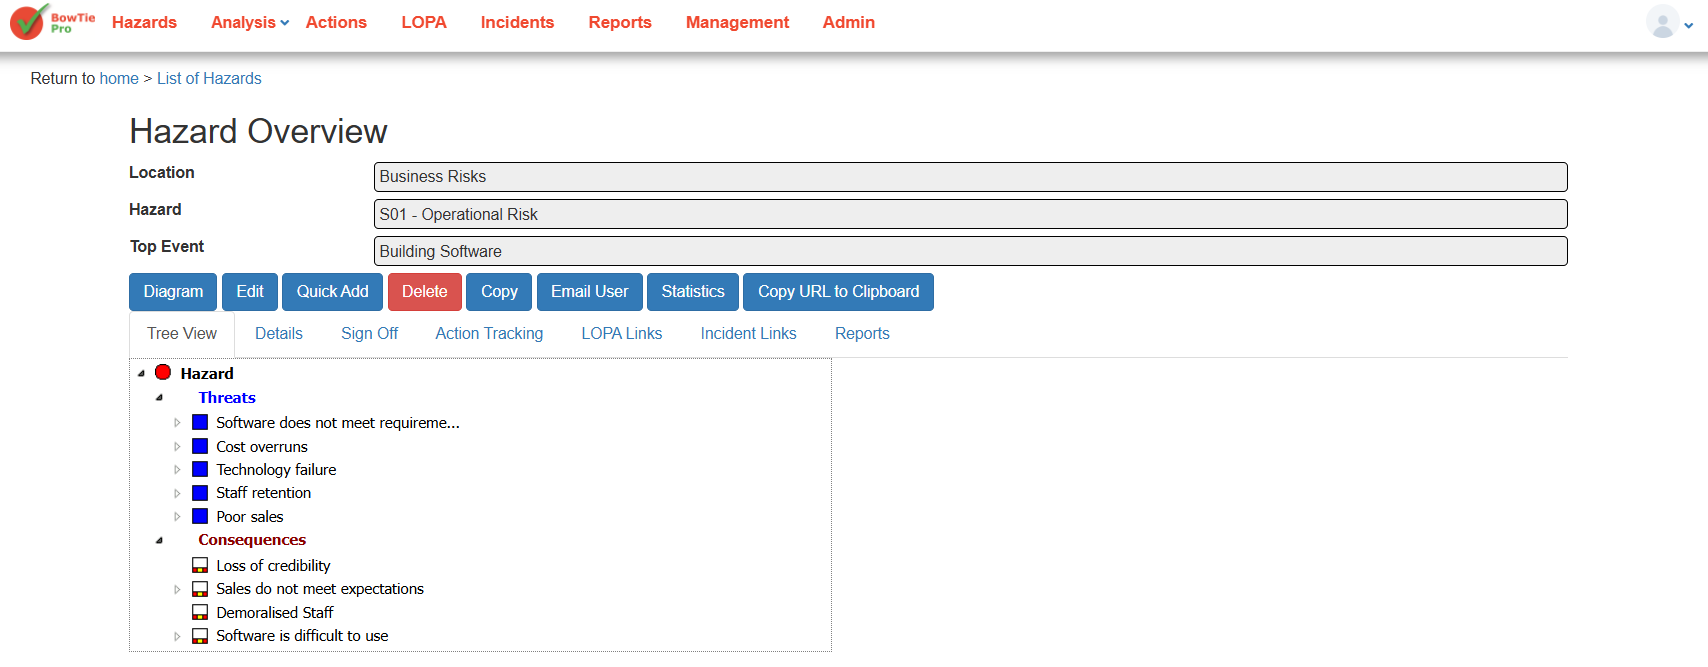
2. Click “Quick Add”
- On the Hazard Overview screen, click Quick Add
- This opens the Add Multiple Items screen
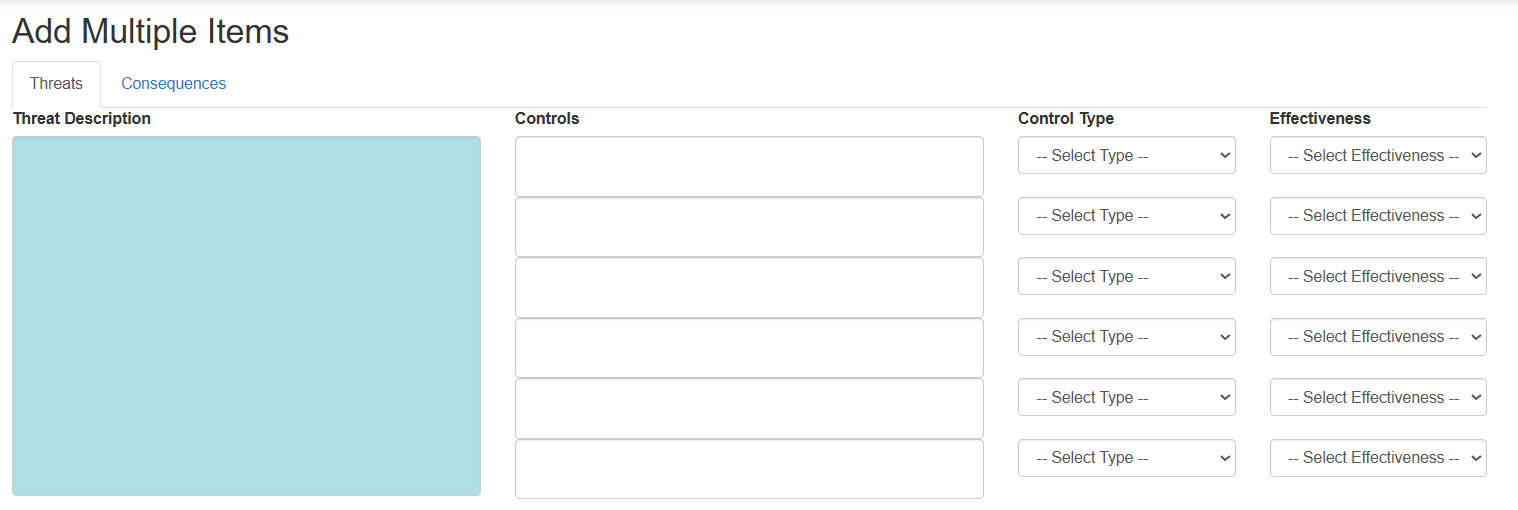
3. Add Controls While Creating Threats
Under the Threats tab:
- Enter the Threat Description
- In the Controls fields:
- Add one or more control measures
- For each control:
- Select a Control Type
- Select Effectiveness
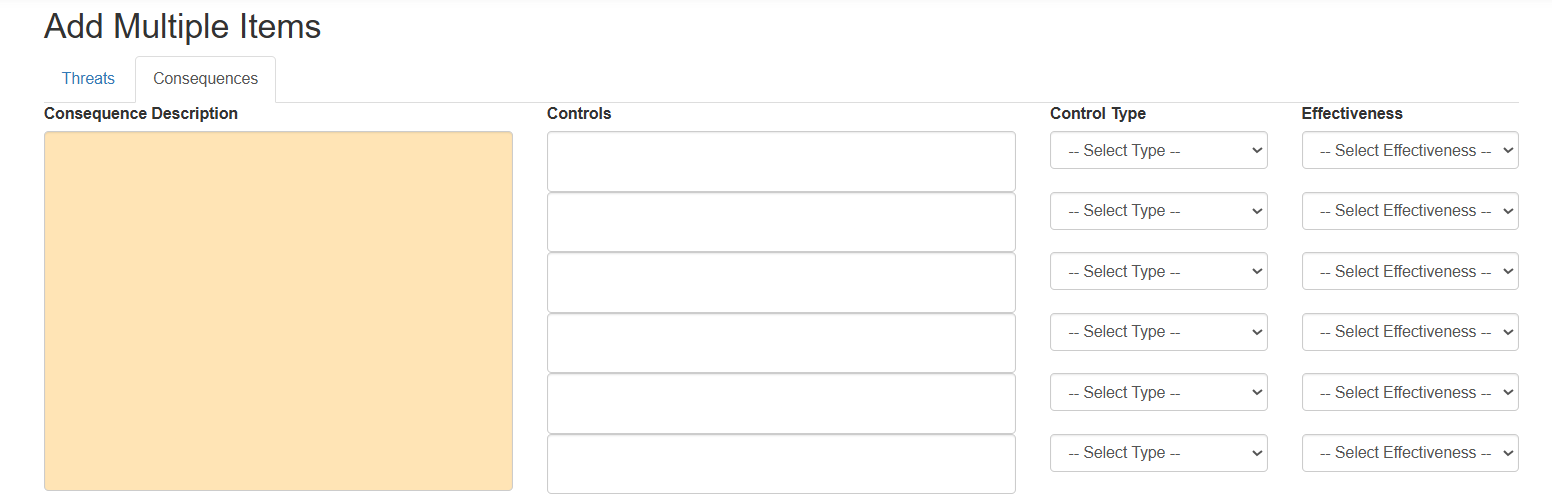
4. Add Controls for Consequences
- Switch to the Consequences tab
- Enter the consequence description
- Add controls in the same way:
- Define control description
- Select type
- Set effectiveness
Viewing Controls
After saving:
- Go to Hazard Overview → Tree View
- Expand:
- A Threat or Consequence
Controls are linked within these items and contribute to the BowTie structure.
Managing Controls
To update controls:
- Open the hazard
- Navigate to the related Threat or Consequence
- Modify the control details using available edit options (if applicable)
Controls are essential for managing risk in BowTiePro. By linking controls to threats and consequences, you can build a strong and effective risk model that helps prevent incidents and reduce impact.